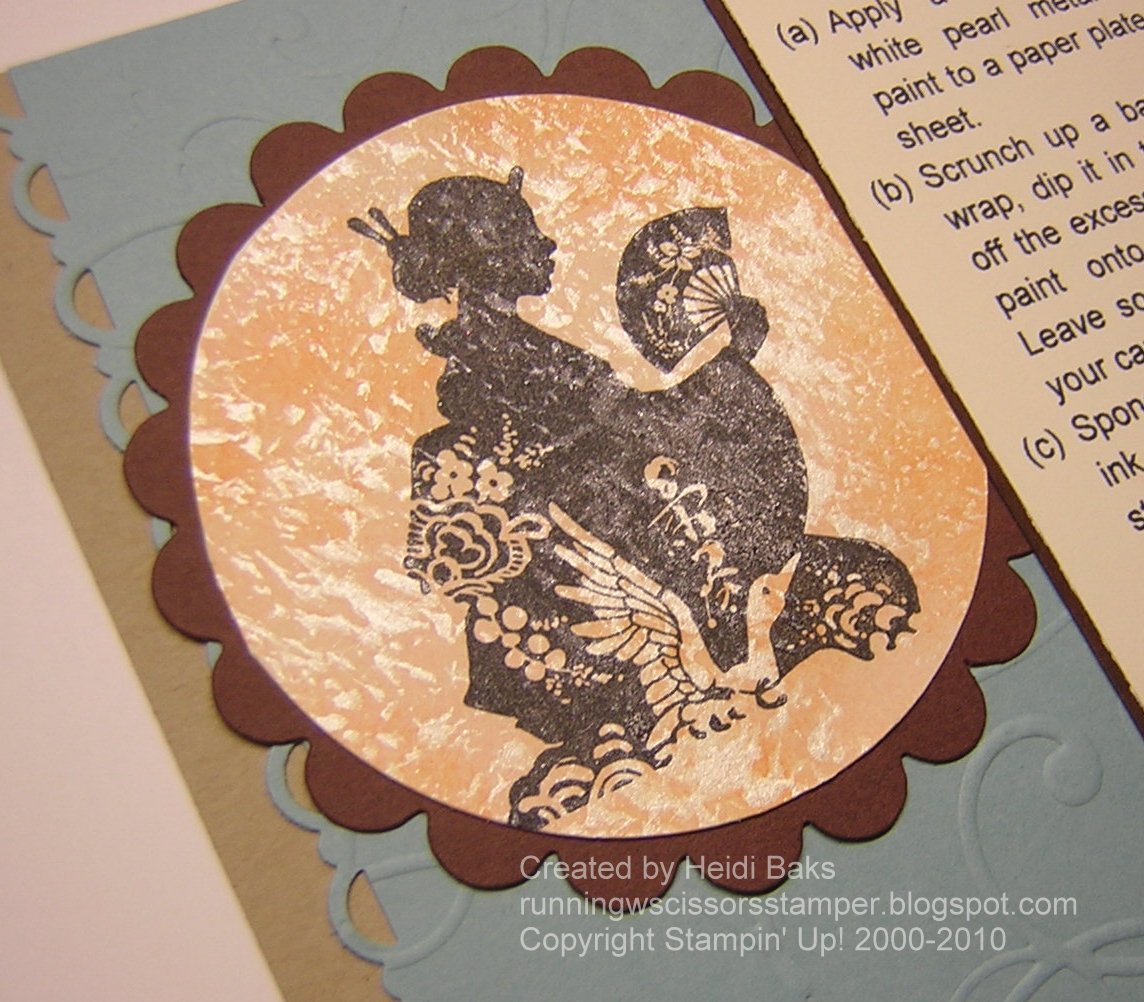
Monday, September 20, 2010

I've Run Away to France...


We are having a family vacation for my father-in-law's 65th birthday in the South of France. A little bit of French Riveria, a lot of Southern Provence. I know, poor me! I will be away through September 30, and then driving directly from JFK to Baltimore for Stampin' Up Regionals on October 1.

I'm sorry I won't be around for personal service. If you need anything during that time, feel free to order through my demonstrator website. If you place an online order between September 20 - October 1, I'll have a special gift for you from Convention.

Thanks for stopping by!

Friday, September 17, 2010

Brayering Basics Class

Ok, here's the real deal... no more teases. This is the cards we made in the Brayering Basics Class.

Stamps: Inspired by Nature; Paper: Old Olive, Whisper White; Ink: So Saffron, More Mustard, Pumpkin Pie, Black Stazon; Accessories: Word Window punch, Brads, Brayer, Circle punch, Post-it notes, Dimensionals.

Graduates of this class can take the Advanced Brayering Class, which will include more advanced techniques to complement your brayering. Now, until then, don't forget to practice!!

Stamps: Nature Silhouettes, Lovely as a Tree; Paper: Night of Navy, Whisper White; Ink: Bashful Blue, Night of Navy, Not Quite Navy, Basic Black, Black Stazon; Accessories: Sponges, Brads, Brayer, Circle punch, Post-it notes, Dimensionals.

Thanks for stopping by!

Thursday, September 16, 2010

Sneak Peek and Some News...

Tonight is the Brayering Basics class. Can't wait. Here's a sneak peek.


So, things are soooo busy right now. Stamp class, vacation, and right afterwards, Regionals. I am going to be presenting a Workshop WOW at Regionals! Stampin' Up called me today. I'm so excited, but I have to pull that together before we leave for vacation.

Thanks for stopping by!

Wednesday, September 15, 2010

Which One?

I'm trying to work out a prototype for my Regionals general swap, and I am just struggling with my clouds. I have ruined a couple of beautifully brayered panels already. Which clouds do you like best? Cards #1 and #2 just use sponges. Panels #3 and #4 use a ripped post-it note to help make thinner clouds.

Card #1 - Two-toned clouds -

Card #2 - Basic Gray clouds -


Main panel #3 - Wispy Crumb Cake/Soft Suede clouds -

Main panel #4 - Wispy Basic Gray clouds -

Stamps: Graveyard Gala, Lovely as a Tree; Paper: Pumpkin Pie, Whisper White, Sahara Sand; Ink: So Saffron, More Mustard, Pumpkin Pie, Black Stazon, Crumb Cake, Soft Suede, Basic Gray; Accessories: Post-it notes, Circle punch, Brayer, Sponges, Brads, Dimensionals.

Thanks for stopping by!

Tuesday, September 14, 2010

Vintage Vogue Friends Page

The Syracuse Regionals in February was canceled due to snow, and I recently found one of the make & takes we would have done on Cindy Major's blog. Check out her work; it is beautiful!

I focused my scrapbook page on the "friend" fun my daughter had with her grandmother in Canada this summer.

You can click on the pic to enlarge, and check out how playful my daughter is being with Grandma's hat. My only complaint is my photos came out so dark. :( Time for a new printing method, I guess.

Stamps: Vintage Vogue; Paper: Bashful Blue, Crumb Cake, Crushed Curry, Rich Razzleberry, Old Olive, Whisper White; Ink: Bashful Blue, Crumb Cake, Crushed Curry, Rich Razzleberry, Old Olive, Soft Suede, Soft Suede marker; Accessories: Piercing Tool, 1" Circle punch, 2-Way glue pen, Dazzling Diamonds glitter, Dimensionals.

Thanks for stopping by!

Monday, September 13, 2010

Technique: Acrylic Block Stamping

I am running late today (what a big surprise!), so a simple layout to highlight a cool technique, acrylic block stamping. Sharon Field came up with this technique. Just simply ink up your clear acrylic block with dye-based, Classic ink and stamp to create a neutral background filler.

Since the ink doesn't soak into the block at all, but rather sits on top, it gives an aged and uneven look when you stamp on cardstock. This technique works well with the vintage look of French Foliage.

I stamped the leaf with Bravo Burgundy and then colored in the open space with a More Mustard Watercolor Crayon and Aquapainter. WebDeb from Stampin' Addicts inspired the colors and layout for this card.

Stamps: French Foliage, Because I Care; Paper: Crumb Cake, Bravo Burgundy, Whisper White; Ink: Crumb Cake, Bravo Burgundy, Black Stazon; Accessories: Mustard button, Linen thread, More Mustard Watercolor Wonder Crayon, Aquapainter, Dimensionals.

Thanks for stopping by!

Friday, September 10, 2010

Butterfly Pansies

I received a swap at Convention using Dawn's butterfly pansies technique, and it inspired me to try it myself. We made this card at the Flowers Technique Class last night. When you get Shimmer Paper wet, it is known to spread reinker really well.

Close-up of the flower:

Here are the steps:

1. Punch two butterflies (Extra Large Butterfly Punch) out of Shimmer White cardstock for each flower.
2. Spritz them with water until the water pools.
3. Load an aquapainter with Elegant Eggplant and touch to the edges of the butterfly wings and watch the ink spread (fun!).
4. Touch the center of the butterfly with Summer Sun ink (substitute Daffodil Delight here).
5. Let the butterflies nearly dry, and then you can curl the edges with a skewer.
6. Use a marker to create center whisker lines (I used Basic Black).
7. Adhere butterflies together with a gold brad.

It looked like such fun, my daughter wanted to make one too. I think hers looks better than mine! See, so easy a 3-year-old can do it!

Stamps: Sincere Salutations; Paper: Very Vanilla, Shimmer White; Ink: Black Stazon, Elegant Eggplant reinker, Summer Sun reinker, Basic Black marker; Accessories: Aquapainter, Gold brads, Very Vanilla satin ribbon, Wide Oval punch, Butterfly punch, Manhattan Flower embossing folder, Topnote die, Big Shot, Dimensionals.

Thanks for stopping by!

Thursday, September 9, 2010

Tutorial: Paper Roses

I previously posted this card, and I had a lot of trouble attaching the flower to the card.

I combined tutorials from Simi Stamper and Splitcoaststampers to come up with this tutorial.

Step 1.
Starting with 2-1/2 x 8-1/2" Orchid Opulence cardstock, destroy fibers in the card stock. You can do this by rubbing the card stock against a edge of a desk, back and forth until the it is easily bendable.


Step 2. Die-cut 3 flowers using the large flower of the Birds & Blooms die, and sponge the edges. I used Rich Razzleberry and speckled the whole flower and Orchid Opulence on the outer edges on both sides.


Step 3. Flower #1 make a cut in-between 2 petals half way up. Flower #2 cut one petal completely out. Flower #3 cut two petals completely out. You should have 5 pieces.


Step 4. Apply glue on right side of petal and overlap petal on the left to make a cone shape. Use paper clips to hold until glue dries. Do this to all flowers excluding the 2 petals you cut out. What you have should look like this now.


Step 5. Roll the top edges of the smallest petal towards the center.


Step 6. Roll the top of the left petal down. Turn the petal around to the opposite side and roll into a cone shape and glue.


Step 7. Pierce a hole through the base of the two-petal flower cone. Thread a piece of wire through the hole. This wire will help you attach your flower to your project. Make sure you pierce the hole far enough away from the point of the flower so you can trim it later to sit flat on your project.


Step 8. Cut the bottom tips off the three-petal cone. Repeat with the four- and five-petal flower sections. This will allow the pieces to nest nicely together.


Step 9. Using a bone folder, curl each of the petal pieces.


Step 10. Apply glue inside the three-petal piece and thread the wired two-petal piece through the center hole. Continue with the four- and five- petal pieces.


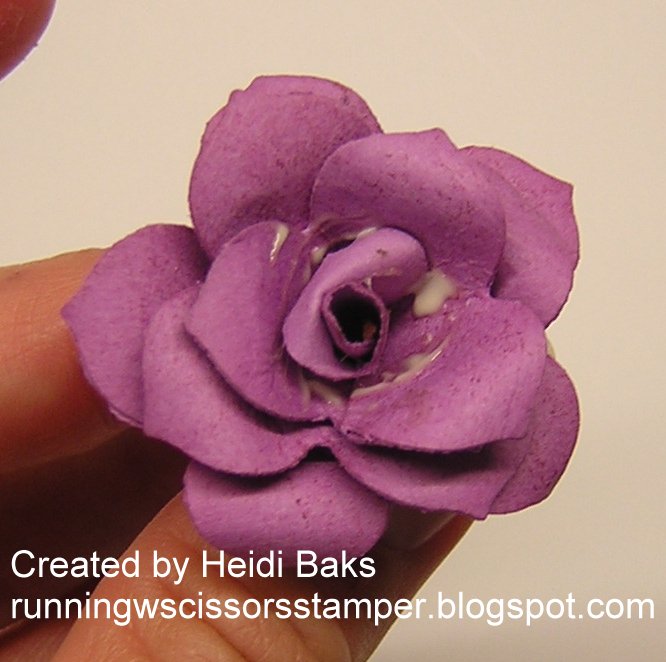
Step 11. Apply glue in the center hole of the flower and insert the rolled up one-petal piece. I had to trim the point off this one-petal piece and also use tweezers to open up the two-petal piece a bit so it would fit.


Step 12. I trimmed the point off the wired two-petal piece so that the flower would sit flat on the project. Mine is still not quite flat enough. Again, the higher you punch your wire hole, the flater you can trim your wired piece to sit flat. Punch/pierce two holes in your project, thread wire through, twist wire on back to secure, and trim extra. There ya go!


Thanks for stopping by!

Wednesday, September 8, 2010

What Kind of Wedding?!?

When my best friend from high school (we were inseparable since 5th grade) told me she was getting married at a Muddy Buddy competition in Chicago, I thought, "What?" Why in the world would you want to compete, be all sweaty, sticky, and muddy, and then take pics during your nuptials? Well, she is kinda crazy!

I was lucky enough to receive a wedding card swap at Convention from Lynn Pratt. What a perfect starting point! She has a link to the template on her blog.

I used the raindrop image from French Foliage (Holiday mini) and Rust embossing powder (retired) to recreate mud. An easy way to create an item from a template is to print it on copy paper, apply with repositional glue to your cardstock, and cut out.

Here you can see more of the mud splatter on the tuxedo.

Stamps: French Foliage; Paper: Whisper White, Basic Black; Ink: Versamark; Accessories: Brads, Rust embossing powder, Vintage Wallpaper embossing folder, Big Shot, Dimensionals, Template.

Here is a pic of the happy couple.

I'm sorry I wasn't able to attend and witness this wonderful event. Thanks for stopping by!

Tuesday, September 7, 2010

Brayering Makes for Quick Cards

When I need a quick card, brayering is my new go-to technique. I haven't had a chance to play with the new stamp set Just Believe yet, so a perfect choice.

I masked the sun area and brayered the whole area with So Saffron. Next I brayered half way down from the top and 1/4 up from the bottom with Peach Parfait. And then I brayered 1/4 down from the top with Pumpkin Pie. To give the sun a slight amount of color, I removed the masked area and brayered again from the top with So Saffron. Brads, glue, and done!

The Brayering Basics class on September 16 is full. Please contact me if you are interested in the next one.

Stamps: Just Believe; Paper: Peach Parfait, Whisper White; Ink: So Saffron, Peach Parfait, Pumpkin Pie, Black Stazon; Accessories: Brayer, Brads, Dimensionals.

Thanks for stopping by!

Monday, September 6, 2010

Flip Book

I have been participating in a training program called Recruit Crew. Each section of the training contains specific challenges for business development. It has been very helpful so far; I just love the training Stampin' Up provides!

One challenge was to create a flip book, with all the answers to frequently asked questions of a potential new recruit. I created this flip book, inspired by fellow demo Michelle Hornback, to give to my next recruit.

In addition, I brought home special goodies from Convention, reserved for my next recruit. Could it be you? ;) Don't forget about the recruiting special right now (link in the right column), a Greenhouse Gala craft tote with each starter kit!

Stamps: Love What You Do (MDS download); Paper: Whisper White, Melon Mambo, Rich Razzleberry, Raspberry Lemonade DSP; Ink: Rich Razzleberry; Accessories: Scallop Trim border punch, Scallop Trim corner punch, Rich Razzleberry ribbon, Crop-o-dile.

Thanks for stopping by!

Friday, September 3, 2010

Technique Swap: Faux Mother of Pearl

This is the technique swap I am doing for the Utica shoebox swap. I am mailing in my swaps, since I cannot be there in person. The shoebox swap is happening on the day of my daughter's birth, the daughter that we lost. We always turn off all electronics on that day and dedicate it to her, usually by going for a long hike if the weather is good. Anywho...

Close-up of the faux mother of pearl - check out that shimmer!

I think it would be cool to combine this technique with some seashell images.

Stamps: Dream Gardens; Paper: Crumb Cake, Baja Breeze, Chocolate Chip, Very Vanilla; Ink: Blush Blossom, Apricot Appeal, Black Stazon; Accessories: Pearl White Metallic acrylic paint (craft store which I always call the "crap" store, haha), Plastic wrap, Sponges, Scallop Trim border punch, Pearl Jewels, Coluzzle, Backgrounds I Texturz plate, Scallop #2 die, Big Shot.

Thanks for stopping by!

Thursday, September 2, 2010

Twisted Swap: Home Sweet Trailer

I joined the "twisted" swap for the upcoming shoebox swap in Utica, NY. I've never done this kind of swap. I don't have very many twisted sayings, but I figure, if it isn't a bit offensive, then it is not twisted. I can't wait to see what I get back! This swap is hosted by a very twisted friend, Tillyhead. She really is twisted!

This card features a stamp set from There She Goes called Tastes Like Chicken. I attempted to make my trailer very vintage-y, let's say, with some sponging. The background looks like wallpaper, so I ripped it up a bit.

Of course, there's got to be a punch line, so here's the inside.

Perhaps this card is reminiscent of the state of the economy these days, but there is always some types of entertainment that are free! ;)

The trick with the trailer is lots of paper piecing, which you may be able to see in this angled shot.

Stamps: Tastes Like Chicken by There She Goes; Paper: Whisper White, Chocolate Chip, Old Olive, Very Vanilla, More Mustard, River Rock, Going Gray, Brocade Background DSP (SU clearance rack); Ink: Early Espresso, Really Rust, Creamy Caramel, River Rock, Old Olive, Basic Black marker, Real Red marker, Accessories: Sponges, Scallop edge punch, Modern Label punch, Brads, Coluzzle.

Thanks for stopping by!

Wednesday, September 1, 2010

First Day

Good Morning, Everyone!

It is one of those days us demonstrators always wait impatiently for... the start of a new mini catalog. Always a wonderful thing! You know how I am about vintage stuff - check out all the new lovelies!! Just click on the pic.

Thinking about signing up to be a demonstrator? Starting today, you will receive a Greenhouse Gala craft tote with your starter kit, through October 18 while supplies last (click the pic). I have one, and it is very convenient! I love it!!

Now back to our regularly scheduled program... my daughter will start her first day of preschool next week. This will probably be a bittersweet day, since Little Missy is my third leg. Nevertheless, to help celebrate the rite of passage, a card.

The Greeting Card Kids set in the main catalog is just sooooo cute! I cut the notebook paper from Newsprint DSP, punched and roughened it up. The background was embossed with Big Shot, aged by running Whisper White craft ink over the raised dots, and then stitched in the sewing machine.

The vintage accessories really make the card. I just love them!

Stamps: Greeting Card Kids, Sentiment by My Digital Studio; Paper: Basic Black, Cherry Cobbler, Very Vanilla, Newsprint DSP; Ink: Blush Blossom, Marina Mist, Cherry Cobbler, Crumb Cake, Soft Suede, Chocolate Chip, Early Espresso, Black Stazon, Whisper White Craft; Accessories: Aquapainter, Bind-It-All, Cutter Kit, Chantilly lace, Vintage trinkets, Horizontal Slot punch, Modern Label punch, Large Oval punch, Perfect Polka Dots embossing folder, Big Shot, Sewing machine, Thread.

Thanks for stopping by!
Blogging tips